As an Amazon Associate, I earn from qualifying purchases at no extra cost to you.
Replace Your Samsung Microwave Door Switch the Easy Way
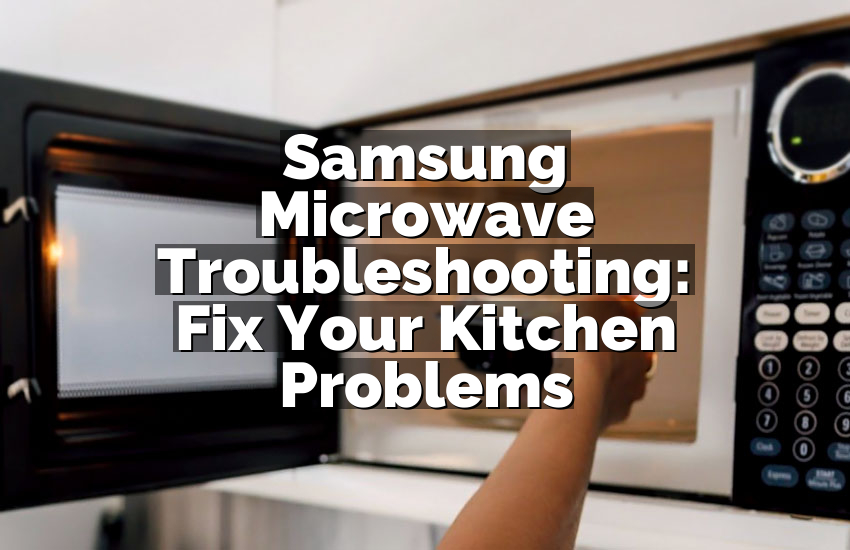
I remember standing in my kitchen, staring at my Samsung microwave that just wouldn't start. The light blinked, the buttons worked, but the door wouldn't trigger the oven. It was so frustrating! I thought, "Do I need a repair guy or can I fix this myself?" In this article, I'll show you exactly how to replace a Samsung microwave door switch in an easy way.
KEY TAKEAWAYS
Replacing a Samsung microwave door switch is simpler than it looks. You just need basic tools, patience, and safety first. The key points are to unplug the microwave, locate the switch, remove the door panel carefully, disconnect the old switch, and install the new one properly. Testing the switch after installation ensures your microwave works safely. This guide saves money, avoids stress, and helps you understand your appliance better. Following these clear steps will get your microwave working again quickly.
Steps to Replace Your Samsung Microwave Door Switch
Check Safety and Gather Tools
Before touching anything inside your microwave, unplug it completely. Microwaves store electricity even when off, so you need to be careful. Wear rubber gloves if possible to protect your hands. Clear your workspace and have a flat surface ready to place screws and panels.
Gather simple tools like a screwdriver set, needle-nose pliers, and maybe a flashlight. You'll also need the correct replacement switch for your Samsung model. Check your model number and buy the exact switch; using the wrong one can damage the microwave. It's better to spend a few minutes checking than rushing later.
Turn off all power sources and remove any dishes from inside. Keep children or pets away. Being safe avoids accidents that are easy to prevent. Once you have everything ready, you'll feel more confident to continue.
Check that you have a small container for screws. Losing tiny screws is easy and annoying. A magnetic tray can help, or even a small bowl works fine. Organize tools and parts so everything is within reach, and you won't waste time searching during the replacement.
- Unplug microwave and remove dishes.
- Wear gloves for protection.
- Gather screwdriver, pliers, and flashlight.
- Prepare a small container for screws.
- Confirm the replacement switch matches your model.
Remove the Microwave Door Panel
The door panel covers the switches and needs careful removal. Start by opening the microwave door fully. Look for screws around the handle or edges. Unscrew them carefully and place them in your container.
Gently separate the outer panel from the inner door. Don't force it; plastic clips can break easily. Slide a flat tool or your fingers carefully along the edges to release clips. Once loose, the inner components will be visible, including the door switch.
Take a moment to note how the parts fit together. You can even take a photo for reference. This helps you put everything back correctly. Avoid touching other electronics inside the door to prevent damage.
Keep track of wires and connectors. Each switch usually has a colored wire, making it easier to match later. Handling them gently ensures they won't snap or come loose accidentally.
- Open microwave door and locate screws.
- Remove screws and store safely.
- Carefully separate outer panel.
- Note or photograph internal parts.
- Handle wires gently to avoid damage.
Disconnect the Old Door Switch
Once the panel is removed, locate the door switch. It's usually a small rectangular piece with wires attached. Observe the wires and their positions carefully.
Gently pull connectors off the terminals. Don't yank; wiggle them slowly while pulling. If needed, use needle-nose pliers for better grip. Note the wire positions to match them when installing the new switch.
Some switches have clips holding them in place. Press or lift the clip and slide out the old switch. Keep it aside; you can compare it with the new one. Double-check you removed all screws or fasteners.
This step requires patience. Rushing can break the clips or wires. Take your time and keep everything organized for smooth reassembly.
- Locate door switch inside panel.
- Observe wires and connections.
- Gently disconnect wire terminals.
- Release clips holding the switch.
- Keep old switch to compare with new one.
Install the New Door Switch
Take your new switch and compare it with the old one. Make sure it matches in shape and connector type. Misplacing the switch can prevent the microwave from working.
Slide the new switch into its position carefully. Press any clips or fasteners to secure it. Reconnect the wires exactly as they were on the old switch. Double-check connections for tightness.
Once the switch is in place, gently test its movement. Press it a few times manually to make sure it clicks and moves like the old one. If it feels loose, adjust it before closing the panel.
Always take your time during installation. Correct placement prevents future problems. A well-installed switch ensures safe and smooth microwave operation.
- Compare new switch with old one.
- Slide switch into place and secure clips.
- Reconnect wires correctly.
- Test switch movement manually.
- Adjust if necessary for a secure fit.
Reassemble the Door Panel
After installing the new switch, carefully put the outer panel back on the door. Line up clips and edges before pressing them together. Avoid forcing anything, as plastic can break.
Replace all screws in their original positions. Don't skip any; missing screws can make the door unstable. Tighten them just enough to hold the panel firmly, not overly tight.
Double-check wires are not pinched or caught between panels. Proper alignment ensures the microwave door closes smoothly. Press the door closed several times to confirm it works correctly.
Cleaning the door lightly before closing is a good idea. Dust or grease can affect the panel fit. A soft cloth makes the door look neat and helps clips hold better.
- Align door panel clips and edges.
- Replace all screws securely.
- Avoid pinching wires.
- Test door closure and switch function.
- Wipe door for smooth assembly.
Test Your Microwave Function
Plug the microwave back into the power outlet. Do not put food inside yet. Press the door closed and check if the microwave lights up and responds to buttons.
Try a short test run without food. Listen for normal sounds and watch for any error codes. If something feels wrong, unplug and recheck the switch connection. Correct any misplacement before using it fully.
Once it passes initial tests, place a cup of water inside and run a short heating cycle. Make sure the microwave heats properly and the door switch works every time.
Congratulations! Your Samsung microwave is now working again. Regularly check the switch over time to make sure it remains secure. Quick maintenance helps extend the life of your appliance.
- Plug microwave and test without food.
- Check lights, buttons, and error codes.
- Run a short cycle with water.
- Confirm switch works every time.
- Regularly inspect switch for safety.
Final Thoughts
Replacing a Samsung microwave door switch is easier than many think. With simple tools, care, and patience, you can fix it at home. This saves money and avoids long waiting for a technician. Following the steps above ensures safety, proper installation, and peace of mind. Don't stress if it takes time; careful work gives lasting results. Your microwave will be back in action quickly, and you'll feel proud of doing it yourself.
| Task | Details | Tips |
|---|---|---|
| Safety first | Unplug microwave, wear gloves | Avoid electric shock |
| Tools | Screwdriver, pliers, flashlight | Keep small container for screws |
| Remove door panel | Unscrew carefully, release clips | Take photo for reference |
| Disconnect old switch | Note wire positions, remove clips | Be gentle with wires |
| Install new switch | Match shape, secure clips, reconnect wires | Test movement manually |
| Reassemble door | Align clips, tighten screws | Avoid pinching wires |
| Test microwave | Short run without food, then with water | Check lights, buttons, and heating |
Frequently Asked Questions (FAQs)
Is it safe to replace a microwave door switch myself?
Yes, it is safe if you follow basic precautions. Always unplug the microwave first. Microwaves store electricity, so don't touch internal components carelessly. Wear gloves and use proper tools. Take your time removing screws and handling wires. Follow the steps carefully, and you can safely replace the switch. Many people fix their own microwaves at home without accidents. Checking connections before powering up prevents problems. Patience and attention to detail make this task safe for beginners.
Can I use any replacement switch for my Samsung microwave?
No, you must use the correct switch for your model. Microwaves have specific switches that fit certain designs. Using the wrong switch can damage the microwave or create a safety hazard. Check your model number and purchase the exact replacement. Even small differences in connectors or shape can prevent proper operation. Compare the old switch with the new one before installing. A proper fit ensures the door closes correctly and the microwave works safely. Always buy from a reliable source for quality.
Do I need special tools for this repair?
Not really. Most people can use basic tools like screwdrivers and needle-nose pliers. A flashlight helps to see inside the door. Rubber gloves are optional but recommended for safety. You might also want a small container for screws. Special tools are not needed unless your model has unusual fasteners. Simple tools make this repair accessible for beginners. Organizing tools before starting makes the process smoother. Focus on patience and careful handling rather than fancy equipment.
Is it difficult to access the door switch inside the microwave?
It can seem tricky at first. The switch is inside the door, so you must remove screws and clips carefully. The door panel needs gentle handling to avoid breaking plastic parts. Take photos or remember wire positions. Following steps methodically makes it much easier. Many first-time repairs feel intimidating, but careful attention makes access simple. With patience, removing the panel and reaching the switch becomes straightforward. Don't rush this part to avoid damaging the door.
Can a bad door switch damage the microwave?
Yes, a faulty switch can prevent proper operation. It may stop the microwave from turning on or create error codes. Continuous use of a defective switch can affect internal circuits. Replacing the switch promptly avoids further damage. A functioning switch ensures the microwave operates safely and efficiently. Ignoring problems may result in higher repair costs later. Checking and replacing a bad switch is a simple preventive step. Safety and functionality improve with a new switch.
Do I need to test the switch before full use?
Absolutely. Testing ensures the switch is installed correctly. Start with a short run without food. Watch lights, listen to sounds, and check error codes. Then run a short cycle with water to confirm heating. Testing prevents accidents and confirms proper operation. Many problems are easy to fix at this stage. Confirming everything works gives confidence before regular use. Testing is quick but critical for safety.
Is it common for Samsung microwave door switches to fail?
Yes, over time switches can wear out. Frequent opening and closing of the door causes mechanical stress. Heat and moisture may also affect the switch. Many users experience this issue after several years. Replacement is usually simple and inexpensive. Regular inspection helps identify issues early. A worn switch is common but not a serious problem if addressed promptly. This repair can restore full functionality quickly.
Can I reuse screws and clips from the old door panel?
Yes, usually all screws and clips can be reused. Keep them organized in a container during disassembly. Check each piece for wear or damage before reinstalling. Replace any broken parts to ensure a secure fit. Reusing hardware saves money and maintains proper door alignment. Take care not to overtighten screws. Proper reassembly keeps the microwave door safe and functional. Using original screws ensures stability.